The Ultimate Real estate Transaction Checklist: 10 Steps for 2025
Navigate your property deal with confidence using our ultimate real estate transaction checklist. Learn how to streamline contracts and eSignatures.
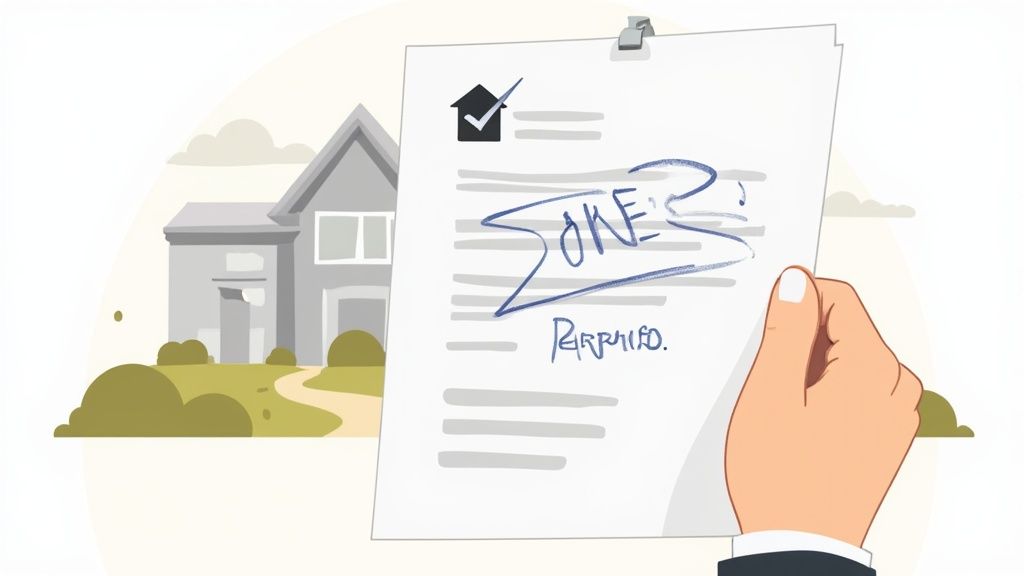
Tired of nonsense pricing of DocuSign?
Start taking digital signatures with BoloSign and save money.
Buying or selling property involves a complex sequence of legal, financial, and logistical steps. A single missed deadline or overlooked document can jeopardize the entire deal, leading to costly delays and immense stress. This comprehensive real estate transaction checklist demystifies the process, breaking it down into manageable stages from pre-offer to post-closing. We'll explore the critical documents, deadlines, and responsibilities at each phase.
More importantly, this guide will show you how modern tools can transform this paper-heavy marathon into a streamlined, secure, and digital experience. By leveraging solutions like BoloSign for compliant eSignatures and AI-powered contract automation, you can instantly create, send, and sign PDFs online. This approach helps manage templates efficiently and close deals faster, all while significantly reducing administrative burdens and risks.
Whether you're a real estate professional managing multiple clients or a business in a document-intensive industry, understanding these workflows is key to success. The principles of diligent tracking and secure document management apply universally. For those specifically navigating the market in the UAE, this comprehensive transaction roadmap can be further supplemented by exploring a practical guide to buying property in Dubai. This checklist provides a universal framework to ensure every detail is accounted for, allowing you to navigate the complexities with confidence and precision. Let's dive into the essential steps that will take you from initial offer to final closing.
1. Get Pre-Approved for a Mortgage
Before you even begin browsing listings, the first crucial step in any serious real estate transaction checklist is securing a mortgage pre-approval. This isn't just a casual estimate; it's a formal letter from a lender stating they are conditionally willing to lend you a specific amount. To get pre-approved, a financial institution performs a detailed review of your credit history, income, assets, and debt-to-income ratio, giving you a clear, realistic budget for your home search.
Why Pre-Approval is Non-Negotiable
A pre-approval letter transforms you from a casual browser into a credible buyer. In competitive markets across the US, Canada, or Australia, sellers often won't even consider an offer without one. It demonstrates that you have the financial backing to follow through on your offer, which significantly reduces the risk of the deal falling through due to financing issues. For example, a buyer in a hot market like Austin, TX, can use their pre-approval to confidently compete in multiple-offer situations, giving them an edge over less-prepared bidders.
Actionable Tips for a Smooth Pre-Approval
To ensure you get the best possible terms and avoid last-minute hurdles, follow these practical steps:
- Distinguish Pre-Approval from Pre-Qualification: A pre-qualification is a quick estimate based on self-reported information. A pre-approval is a verified, conditional commitment from the lender and holds far more weight. Always opt for a full pre-approval.
- Shop Multiple Lenders: Don't settle for the first offer. Compare rates, fees, and terms from at least three different lenders (banks, credit unions, mortgage brokers) to secure the most favorable loan.
- Organize Your Documents: Lenders will require pay stubs, W-2s, tax returns, and bank statements. Using a tool with contract automation can help you securely compile and manage these digital documents, making the application process faster and more organized when you need to sign and submit them electronically.
- Maintain Financial Stability: Once you apply, avoid making any large purchases, opening new credit lines, or changing jobs. Any significant financial shift can jeopardize your final loan approval.
2. Hire a Real Estate Agent or Attorney
Once you have your finances in order, the next pivotal step in your real estate transaction checklist is to engage a qualified professional to guide you. This means hiring a licensed real estate agent or a specialized real estate attorney to represent your interests. These experts provide invaluable market knowledge, negotiation skills, and legal oversight, ensuring you navigate complex contracts and procedures while protecting your significant financial investment.
Why Professional Representation is a Game-Changer
Attempting to manage a real estate deal alone can be fraught with risk. A professional acts as your advocate, negotiator, and project manager. For instance, in the US, agents affiliated with the National Association of REALTORS® (NAR) are bound by a strict code of ethics, ensuring they prioritize your best interests. Similarly, a real estate attorney is essential for complex transactions, like those involving investment properties or potential title disputes, providing a layer of legal protection that agents cannot offer.
Actionable Tips for Selecting Your Advocate
Choosing the right representative is crucial for a smooth and successful transaction. Follow these practical steps to find the perfect fit:
- Interview Multiple Candidates: Don't just go with the first recommendation. Meet with at least three agents or attorneys to compare their experience, communication style, and strategy for your specific needs.
- Verify Credentials: Check the license status and any disciplinary history of potential agents through your state's or province's real estate commission. For attorneys, confirm they specialize in real estate law with your local bar association.
- Clarify Compensation Upfront: Understand the commission structure for an agent or the fee arrangement for an attorney before signing any agreements. This transparency prevents surprises at closing.
- Demand Local Expertise: Ensure your agent has a proven track record in your target neighborhood or that your attorney is well-versed in local real estate regulations and ordinances.
- Streamline Your Agreements: When you sign a representation agreement, using a platform with eSignature capabilities simplifies the onboarding process. BoloSign lets you create, send, and sign engagement letters instantly from anywhere, creating a clear, legally-binding record of your professional relationship that complies with ESIGN and eIDAS standards.
3. Conduct a Home Inspection
After your offer is accepted, the due diligence period begins, and the most critical step is to conduct a professional home inspection. This is not a cursory walkthrough; it's a comprehensive evaluation by a licensed inspector who assesses the property’s major systems and structural integrity. The inspector will examine everything from the foundation to the roof, including plumbing, electrical, and HVAC systems, to identify existing defects, potential safety hazards, and necessary future repairs.

Why a Professional Inspection is Non-Negotiable
An inspection provides the leverage and information you need to move forward confidently in any real estate transaction checklist. It empowers you to either renegotiate the purchase price, request repairs from the seller, or walk away from the deal if significant issues are uncovered. For example, an inspector discovering foundation cracks in a suburban home could lead to a $15,000 credit at closing, while another identifying an outdated electrical panel could prompt the seller to replace it before the sale, saving the buyer thousands.
Actionable Tips for a Thorough Inspection
To maximize the value of your home inspection and protect your investment, follow these practical steps:
- Attend the Inspection: Be present during the inspection to see issues firsthand and ask the inspector questions. This direct interaction provides context that a written report alone cannot.
- Hire a Certified Professional: Choose an inspector certified by a reputable organization like the American Society of Home Inspectors (ASHI) or the National Association of Home Inspectors (NAHI). Always verify their license and insurance.
- Request a Detailed Report: The final report should include clear photos and detailed descriptions of all findings. You can use a platform offering digital signing solutions to easily sign the inspection agreement and receive the report electronically, keeping all your transaction documents organized.
- Consider Specialized Inspections: Depending on the property's age and location, you may need separate inspections for termites, radon gas, mold, or septic systems. Don't rely on a general inspection to cover these specific areas.
4. Obtain a Property Appraisal
After your offer is accepted, the next critical item on your real estate transaction checklist is the property appraisal. This is an independent, professional assessment of the home's fair market value, typically ordered by the lender. Its primary purpose is to ensure that the loan amount you're requesting does not exceed the property's actual worth, safeguarding both you and the financial institution from an inflated valuation. The appraiser analyzes the property's condition, size, features, and recent sales of comparable homes in the area to arrive at an official value.
Why the Appraisal is a Deal-Defining Moment
The appraisal is often a major contingency in the purchase agreement. If the appraised value comes in lower than your offer price, it creates an "appraisal gap." For instance, if you offer $500,000 for a home but it only appraises for $480,000, the lender will only finance a loan based on the $480,000 value. This can put the entire transaction at risk unless a solution is found, making the appraisal a crucial hurdle to clear before closing.
Actionable Tips for Navigating the Appraisal
A low appraisal doesn't have to derail your purchase. Proactive steps can help you prepare for and respond to the outcome:
- Schedule It Early: Order the appraisal as soon as you are under contract. This gives you ample time to address any issues that may arise without rushing against your closing deadline.
- Prepare an Information Packet: Provide the appraiser with a list of recent upgrades, major repairs, and any unlisted features that add value. Including receipts and permits can substantiate these claims.
- Understand Your Contingency: Your purchase contract should include an appraisal contingency that outlines your options if the value is low. This may allow you to renegotiate the price with the seller, cover the difference in cash, or walk away from the deal without losing your earnest money.
- Challenge a Low Appraisal: If you believe the appraisal is inaccurate, you can formally dispute it. Gather your own data on comparable home sales and present a well-reasoned case to the lender for a reconsideration of value.
5. Review Title Report and Purchase Title Insurance
Once your offer is accepted and you're officially under contract, the next critical item on your real estate transaction checklist is to investigate the property's legal history. This is accomplished by obtaining a title search and report, which verifies that the seller has clear, undisputed ownership and the legal right to sell the property. Securing title insurance is the final step in this process, providing crucial financial protection against future claims or ownership disputes that could arise after closing.
Why Title Verification is Non-Negotiable
A clean title is the foundation of legitimate property ownership. A title search uncovers potential issues, known as "clouds" or "defects," that could jeopardize your rights to the property. For instance, a title search could reveal an unpaid contractor’s lien from a previous renovation, an overlooked heir with a claim to the property, or an easement granting a neighbor access across your backyard. Without resolving these issues before closing, you could inherit costly legal battles. Purchasing an owner's title insurance policy is your safeguard against these unforeseen, and often hidden, risks.
Actionable Tips for a Clear Title
To navigate the title review process effectively and protect your investment, follow these practical steps:
- Initiate the Title Search Immediately: Request the title search as soon as you are under contract. This allows ample time to review the commitment and address any issues without delaying your closing date.
- Scrutinize the Title Commitment: The title commitment is a preliminary report outlining the current status of the title and lists any "exceptions" not covered by the insurance policy. Review this document carefully with your real estate agent or attorney to understand every detail.
- Address Liens Before Closing: Insist that the seller resolves any discovered liens or judgments before the closing date. This could involve paying off old property taxes, settling a dispute with a creditor, or obtaining a release for a paid-off mortgage that was never properly recorded.
- Always Purchase an Owner's Policy: While a lender's title policy protects the mortgage provider, an owner's title insurance policy protects your equity in the property. It's a one-time fee paid at closing that provides protection for as long as you or your heirs own the home.
- Manage Documents Digitally: The title commitment, insurance policy, and related correspondence are critical documents. Using a platform for eSignature solutions helps you securely receive, sign, and store these vital records in a centralized, accessible location, ensuring you can find them years later if a claim arises.
6. Make a Competitive Offer and Negotiate Terms
Once you've found the right property and secured your financing, the next pivotal step in the real estate transaction checklist is to submit a formal purchase offer. This is where you and your agent craft a legally binding proposal based on market analysis, the property's condition, and your financial standing. This critical phase involves negotiating price, contingencies, and other key terms with the seller to reach a mutually acceptable agreement that moves both parties toward closing.
Why a Strategic Offer is Non-Negotiable
A well-researched and strategically crafted offer sets the tone for the entire negotiation and can be the deciding factor in securing your dream home. In a buyer's market, an offer slightly below the asking price might be accepted, whereas in a competitive seller's market, you may need to offer at or above the list price to stand out. For instance, a buyer might include a personal letter to the seller or offer a flexible closing date to make their proposal more appealing than a competing bid with a slightly higher price.
Actionable Tips for a Winning Offer and Negotiation
To position your offer for success and navigate negotiations effectively, follow these practical steps:
- Base Your Offer on Data: Rely on a comparative market analysis (CMA) provided by your real estate agent to justify your offer price. This analysis compares the subject property to similar homes that have recently sold in the area.
- Include Protective Contingencies: Standard contingencies for financing, appraisal, and home inspection are crucial. They provide a legal exit from the contract if the home has major issues or your loan falls through, protecting your earnest money deposit.
- Negotiate Beyond Price: Consider negotiating other terms, such as asking the seller to cover a portion of the closing costs, including certain appliances, or paying for a home warranty. Every concession can improve the deal's overall value.
- Streamline Document Revisions: Negotiations often involve multiple counter-offers. When terms are changed, it's essential to track every modification. Understanding how to redline a contract digitally helps you clearly highlight and review changes, ensuring all parties agree on the final terms before signing.
7. Secure Homeowners Insurance Quote and Policy
An often-overlooked but mandatory item on your real estate transaction checklist is securing a homeowners insurance policy. This isn't just a suggestion; it's a firm requirement from mortgage lenders. They need to know that their investment (your new home) is protected against potential disasters like fire, theft, or natural calamities. Before a lender will release the funds for your loan at closing, you must provide proof of an active and adequate insurance policy.
Why Homeowners Insurance is a Closing Prerequisite
Beyond being a lender requirement, homeowners insurance is your financial safety net. It covers both the structure of the home and your personal belongings, and it also provides liability protection if someone is injured on your property. For example, a homebuyer in a hurricane-prone area like coastal Florida must secure a policy with specific wind and flood coverage well before the closing date. Failing to do so can delay or even terminate the entire transaction, as the lender will not proceed without this critical protection in place.
Actionable Tips for a Smooth Insurance Process
To avoid last-minute complications and ensure you get the best coverage for your money, follow these practical steps:
- Start Shopping Early: Begin getting quotes as soon as your offer is accepted. This gives you ample time to compare policies and avoid a rushed, expensive decision right before closing.
- Compare Multiple Quotes: Obtain quotes from at least three different insurance providers to compare coverage limits, deductibles, and premiums. Don't forget to ask about discounts for bundling auto insurance, installing security systems, or having a good credit score.
- Understand Your Coverage: Distinguish between replacement cost (which pays to rebuild your home as it was) and actual cash value (which pays the depreciated value). Replacement cost is almost always the better option for comprehensive protection.
- Secure and Share Proof of Insurance: Once you select a policy, you’ll receive an insurance binder, which serves as temporary proof of coverage. You must provide this document to your lender and closing agent. Using an eSignature platform with contract management features allows you to receive, sign, and instantly share the policy documents with all necessary parties, ensuring a seamless and documented delivery.
8. Review and Sign Final Documents and Disclosure Forms
The final step before getting the keys is arguably the most document-intensive: reviewing and signing the closing paperwork. This critical stage involves a thorough examination of all final documents, including the Closing Disclosure, deed, promissory note, and various required disclosure forms. This isn't just a formality; it's your last chance to ensure that every term, number, and condition perfectly aligns with your purchase agreement and that you fully understand your financial and legal obligations.

Why This Final Review is Mission-Critical
This final review is your ultimate safeguard against costly errors and future disputes. An undiscovered mistake, such as an incorrect property tax proration or an unexpected prepayment penalty in the promissory note, can have significant financial consequences long after closing. In the US, the Dodd-Frank Act's TRID rules mandate that buyers receive the Closing Disclosure at least three business days before closing, specifically to provide adequate review time. Diligently verifying every detail ensures the transaction concludes exactly as negotiated, protecting your investment and preventing post-closing surprises.
Actionable Tips for a Flawless Document Review
To navigate the closing table with confidence, follow these practical steps for a thorough and accurate document review:
- Request Documents in Advance: Ask your lender or title company to provide all closing documents at least 24 hours before the scheduled signing. This gives you ample time to review them without feeling rushed.
- Compare the Closing Disclosure (CD) and Loan Estimate (LE): Carefully scrutinize your final CD against the initial LE you received. Check for any discrepancies in the interest rate, loan terms, and closing costs. Question any changes immediately.
- Verify All Financials: Bring a calculator to double-check all figures. Confirm that your earnest money deposit, down payment, seller credits, and any other concessions have been correctly applied to the final settlement statement.
- Don't Sign What You Don't Understand: If a clause in the deed of trust or a specific title exception seems unclear, ask for an explanation. Never sign a document until you are completely comfortable with its contents and implications. Having an attorney present can provide an extra layer of protection.
- Leverage Digital Tools for Efficiency: The closing package can be overwhelming. Using a platform for electronic signatures for real estate can streamline the process for any pre-closing documents. BoloSign allows you to create, send, and sign PDFs or forms instantly, ensuring you have secure, compliant digital copies of everything you endorse.
9. Perform Final Walk-Through and Property Inspection
The final walk-through is your last opportunity to inspect the property before the keys are officially yours. This crucial step in the real estate transaction checklist occurs 24-48 hours before closing and serves as a final quality control check. It's not another home inspection but a verification that the home's condition hasn't changed, all agreed-upon repairs have been completed, and that the property you are about to purchase is in the state you negotiated.
Why the Final Walk-Through is a Critical Checkpoint
This is your last line of defense against costly, post-closing surprises. Once you sign the closing papers, any issues you discover become your responsibility. Imagine closing on a home only to find the seller removed the high-end refrigerator that was supposed to stay, or a pipe burst overnight, causing significant water damage. The final walk-through allows you to identify and address these problems before the deal is sealed, protecting your investment and ensuring the seller upholds their end of the contract.
Actionable Tips for a Thorough Final Walk-Through
To make this step effective and avoid overlooking critical details, approach it methodically with your agent:
- Time It Right: Schedule the walk-through as close to the closing time as possible, preferably after the sellers have moved out completely. This provides the clearest view of the property.
- Bring Your Inspection Report: Use your initial home inspection report and the repair addendum as a detailed checklist. Verify that every single negotiated repair has been completed to a professional standard.
- Test Everything: Don't be shy. Turn on every light switch, run all faucets (hot and cold), flush toilets, test the HVAC system, and run major appliances for a few minutes to ensure they are in working order.
- Document Meticulously: Take photos or videos of the property's condition and any discrepancies you find. If you need to raise an issue, this digital proof is invaluable. You can use a tool with contract automation to quickly create and sign a final sign-off sheet or a repair amendment if needed, ensuring all parties acknowledge the findings electronically and without delaying the closing.
- Look for New Damage: Carefully inspect walls, floors, and ceilings for any new damage that may have occurred during the seller's move-out process, like scratches, dents, or broken fixtures.
10. Complete Closing and Fund the Transaction
The closing, often called the settlement, is the final and most anticipated step in any real estate transaction checklist. This is the formal meeting where ownership of the property officially transfers from the seller to the buyer. During this event, all outstanding documents are signed, funds are exchanged, and the keys are handed over, culminating the weeks or months of preparation into a single, conclusive action.
Why Closing is the Final Hurdle
Attending the closing is the non-negotiable finish line where the agreement becomes a reality. This is where the buyer provides the remaining funds via a cashier's check or wire transfer, and the lender disburses the loan amount. For example, in a residential transaction, all parties-including the buyer, seller, agents, and a closing agent from the title company or law firm-gather to execute a stack of documents like the deed, mortgage note, and settlement statement. This formal process ensures all legal and financial obligations are met and properly recorded.
Actionable Tips for a Flawless Closing Day
To ensure the final step is smooth and stress-free, meticulous preparation is key. Follow these practical tips for a successful closing:
- Verify Funding Instructions: Wire fraud is a significant risk. Always verbally confirm wiring instructions with the title company or attorney using a known, trusted phone number before sending any funds. Do not rely on instructions sent via email alone.
- Review the Settlement Statement (HUD-1/Closing Disclosure): You should receive this document at least three days before closing. Review every line item carefully to ensure all costs, credits, and fees are accurate and match what you were quoted.
- Bring Necessary Items: You will need a government-issued photo ID (like a driver's license), a cashier's check for the closing costs if not wiring funds, and any other documents requested by your lender or the title company.
- Keep Meticulous Records: After signing, you will receive a large package of documents. Keeping these organized is crucial for future tax purposes and records. Using a platform designed for real estate contract management software can help you securely store and access digital copies of your final closing package for years to come.
10-Step Real Estate Transaction Comparison
| Step | 🔄 Implementation complexity | 💡 Resource requirements | ⭐ Expected outcomes | 📊 Ideal use cases | ⚡ Key advantages |
|---|---|---|---|---|---|
| Get Pre-Approved for a Mortgage | Moderate — document collection and lender review; hard credit inquiry | Pay stubs, tax returns, bank statements, lender time; no major fees | ⭐⭐⭐⭐ — establishes buying power; not final guarantee | Competitive markets; early budgeting; first-time buyers | Speeds closing, strengthens offers, reveals financing issues |
| Hire a Real Estate Agent or Attorney | Low–Moderate — vetting, ongoing coordination | Commission/fees or attorney rates; time to interview and verify credentials | ⭐⭐⭐⭐⭐ — expert negotiation and legal protection | Any transaction; complex deals; luxury or investor purchases | MLS access, negotiation skill, legal review, network of vendors |
| Conduct a Home Inspection | Low — schedule and attend inspection; moderate prep | Inspector fee ($300–$500), possible specialty inspections (radon, termites) | ⭐⭐⭐⭐⭐ — uncovers defects; provides repair estimates | Older homes, resale properties, buyers needing risk mitigation | Identifies hidden issues; strong negotiation leverage; cost-effective |
| Obtain a Property Appraisal | Low — lender orders appraisal; may delay timeline | Appraisal fee ($400–$600); appraiser report with comps | ⭐⭐⭐⭐ — confirms market value; lender-required | Lender-financed purchases; refinancing; unique properties | Prevents overpaying; supports lender underwriting |
| Review Title Report & Purchase Title Insurance | Moderate — review title commitment and resolve exceptions | Title search, premium ($500–$1,500), title company or attorney time | ⭐⭐⭐⭐⭐ — protects ownership; covers legal defense | All purchases; properties with complex history or liens | Lifetime owner protection, detects liens/easements before closing |
| Make a Competitive Offer & Negotiate Terms | High — strategy, contingencies, and back-and-forth negotiation | CMA, agent expertise, earnest money deposit (1–3%) | ⭐⭐⭐⭐ — can secure favorable terms but may be rejected | Competitive or shifting markets; buyers seeking concessions | Potential price reductions, protective contingencies, clarify terms |
| Secure Homeowners Insurance Quote & Policy | Low — compare policies and bind coverage before closing | Premiums, policy selections, endorsements; proof required for lender | ⭐⭐⭐⭐ — protects asset and satisfies lender requirement | All closings; properties in high-risk zones needing extra coverage | Financial protection, liability coverage, lender compliance |
| Review & Sign Final Documents and Disclosure Forms | High — complex documents with limited review time | Closing Disclosure, deed, loan docs; attorney or agent assistance | ⭐⭐⭐⭐⭐ — final verification; legally binding transaction | Every closing; transactions needing legal scrutiny | Confirms terms, prevents surprises, creates official record |
| Perform Final Walk-Through & Property Inspection | Low — short, time-sensitive quality check | 15–30 minutes, inspection checklist, agent/attorney present | ⭐⭐⭐⭐ — verifies repairs and condition before ownership | Immediately prior to closing; when repairs were negotiated | Last chance to catch issues, confirm inclusions, halt closing if needed |
| Complete Closing & Fund the Transaction | High — coordination, signatures, and secure fund transfer | Closing costs (typically 2–5%), cashier's check or wire, IDs, notary | ⭐⭐⭐⭐⭐ — ownership transfers, deed recorded, funds disbursed | Culmination of all purchases; lender-involved transactions | Official transfer of title, lender funding, final settlement and records |
Modernize Your Real Estate Workflow with BoloSign
Navigating the intricate path from pre-approval to post-closing is a monumental task. As we’ve detailed, a comprehensive real estate transaction checklist is your roadmap to success, breaking down this complex journey into manageable stages: pre-offer preparation, diligent negotiation, securing financing, meticulous due diligence, and finally, the closing itself. Each step, from obtaining mortgage pre-approval and hiring the right agent to conducting inspections and reviewing title reports, is a critical link in a chain that leads to a successful property transfer. The common thread connecting every single one of these items? An immense volume of critical, time-sensitive, and legally binding documentation.
The traditional approach to managing this paperwork is no longer sustainable in a fast-paced market. Printing, scanning, manually tracking versions, and chasing wet signatures introduce unnecessary delays, increase the risk of errors, and create significant security vulnerabilities. This is where the true value of modernizing your workflow becomes undeniable. Mastering this checklist isn't just about ticking boxes; it's about optimizing the process to be faster, more secure, and less stressful for everyone involved.
From Checklist to Closed: The Digital Transformation
The key takeaway from our detailed real estate transaction checklist is that efficiency and accuracy are paramount. Think about the most frustrating parts of any transaction:
- Delays in Communication: Waiting for a signed offer or counter-offer to be returned can mean losing a deal.
- Document Errors: A single mistake on a disclosure form or purchase agreement can derail a closing.
- Compliance Risks: Ensuring every signature and document adheres to legal standards like ESIGN and eIDAS is non-negotiable.
This is precisely why a digital-first approach is essential. By embracing a unified platform for contract management and eSignatures, you eliminate the friction points that plague traditional real estate deals. You transform a reactive, paper-based process into a proactive, secure, and streamlined digital workflow. This shift not only saves time and money but also enhances the client experience, building a reputation for professionalism and cutting-edge service.
Why BoloSign is Your Ultimate Transaction Partner
BoloSign was engineered to solve these exact challenges. Our platform isn't just a tool to sign PDFs online; it's a complete contract automation and intelligence ecosystem designed for the high-stakes world of real estate. Instead of juggling multiple apps for document creation, review, and signing, you can manage the entire lifecycle from one secure dashboard.
Key Insight: The most successful real estate professionals don't just follow a checklist; they leverage technology to automate and secure it. BoloSign provides the engine to power that automation, turning your checklist into a dynamic, efficient, and error-proof workflow.
Our AI-powered features offer a distinct competitive advantage. Imagine using AI contract review to instantly analyze purchase agreements for missing clauses or potential risks before you ever send them to a client. Picture creating standardized offer letters, inspection addendums, and commission agreements from templates in seconds, ensuring consistency and compliance across your entire team.
Furthermore, BoloSign’s transparent pricing model is a game-changer for real estate agencies. Unlike competitors that charge per user or per document, we offer unlimited documents, templates, and team members for one fixed price. This makes our platform up to 90% more affordable than DocuSign or PandaDoc, allowing you to scale your operations without worrying about escalating costs. You get enterprise-grade security, full legal compliance (including HIPAA for relevant transactions), and powerful contract automation features at a fraction of the cost. Your real estate transaction checklist deserves a modern solution built for speed, security, and savings.
Ready to close deals faster and more securely? Experience how BoloSign can transform your real estate workflow by replacing manual paperwork with streamlined eSignature and AI-powered automation. Start your 7-day free trial today to see firsthand why top agencies are making the switch.

Paresh Deshmukh
Co-Founder, BoloForms
9 Dec, 2025
Take a Look at Our Featured Articles
These articles will guide you on how to simplify office work, boost your efficiency, and concentrate on expanding your business.